Difference between revisions of "3GPP voting tool"
Borgesormond (talk | contribs) (→Permissions on the tool) |
Borgesormond (talk | contribs) (→Vote/election details page) |
||
| Line 132: | Line 132: | ||
| − | An example of an election details page is visible in Figures 3 and 4. On the vote/election details page, all users can see the existing ballots (voting sessions). | + | An example of an election details page is visible in Figures [[#_Toc66107691|3]] and [[#_Toc66107692|4]. On the vote/election details page, all users can see the existing ballots (voting sessions). |
Revision as of 13:22, 15 March 2021
Contents
3GPP voting tool - User guide
This page contains a brief explanation of the 3GPP voting tool’s main functionalities. The goal is to allow users to get familiarized with the tool.
Last update: This guide was last updated on March 10th, 2021.
Table of figures
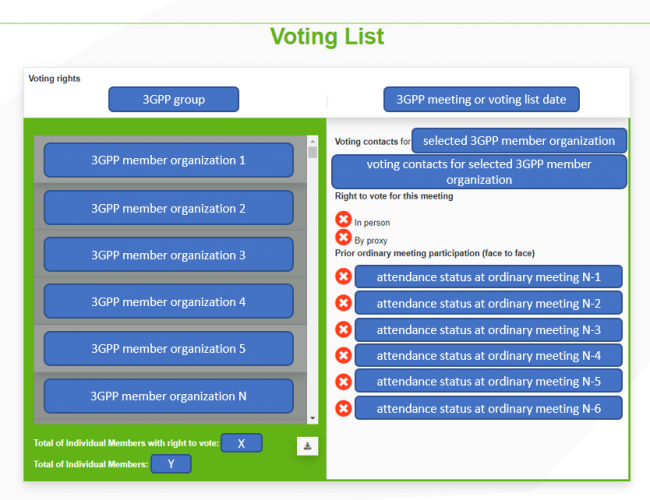
Figure 1 – Voting list example.
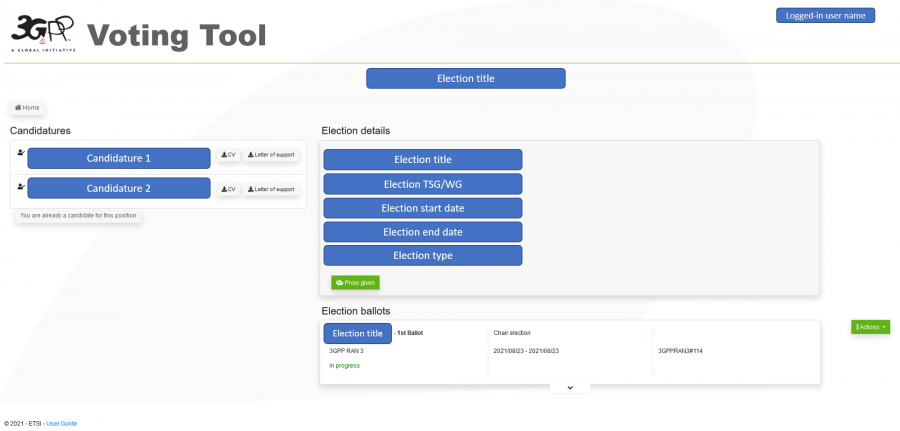
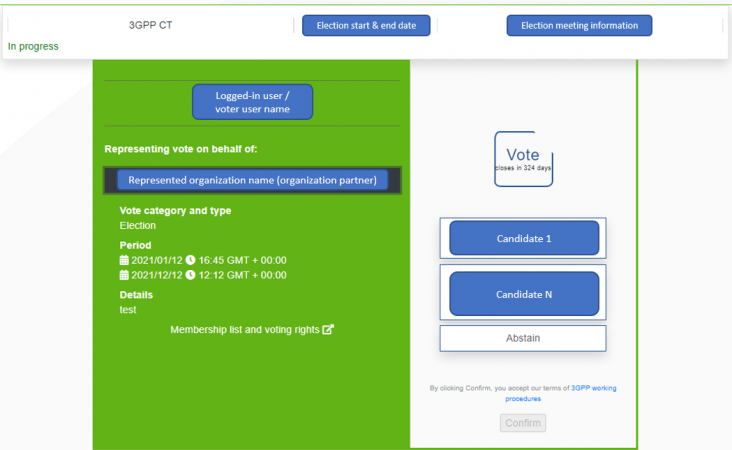
Figure 3 – Example of an election details page.
Figure 5 – Example of an upcoming technical vote details page, by correspondence.
Figure 6 – Example of a candidature submission button for an upcoming election.
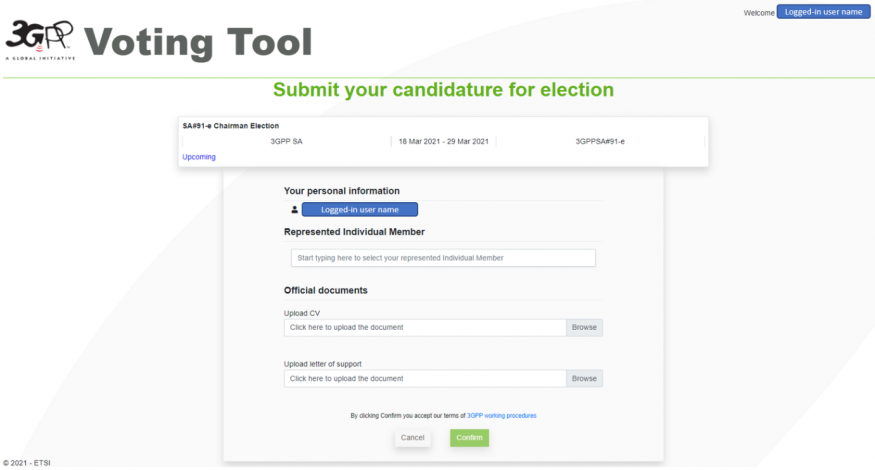
Figure 7 – Example of a candidature submission page.
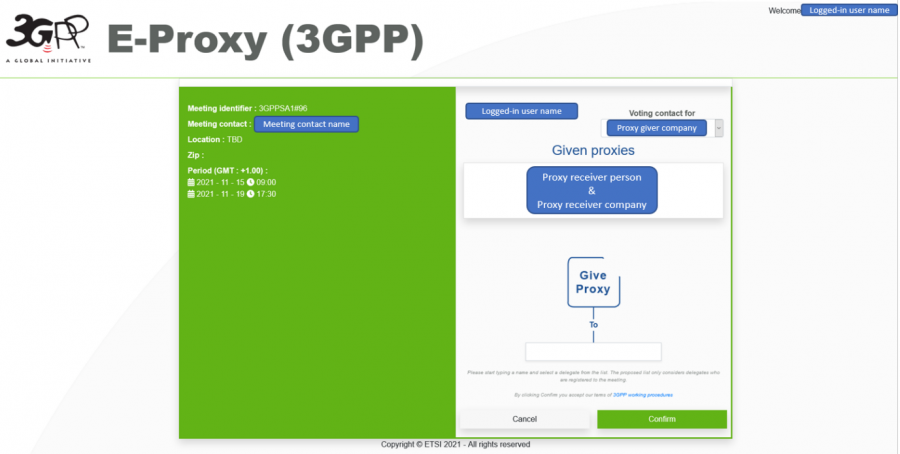
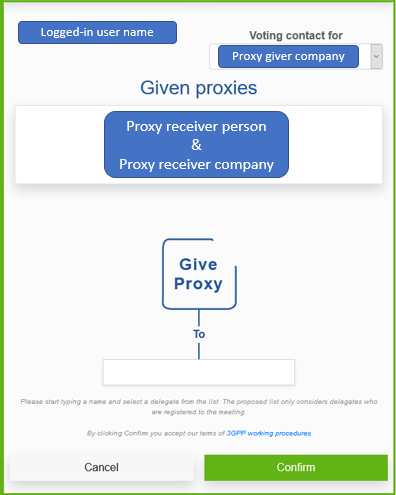
Figure 9 – Example of a proxy giving page.
Figure 10 – Close-up of a sample given proxy. The red withdraw button is visible on the right.
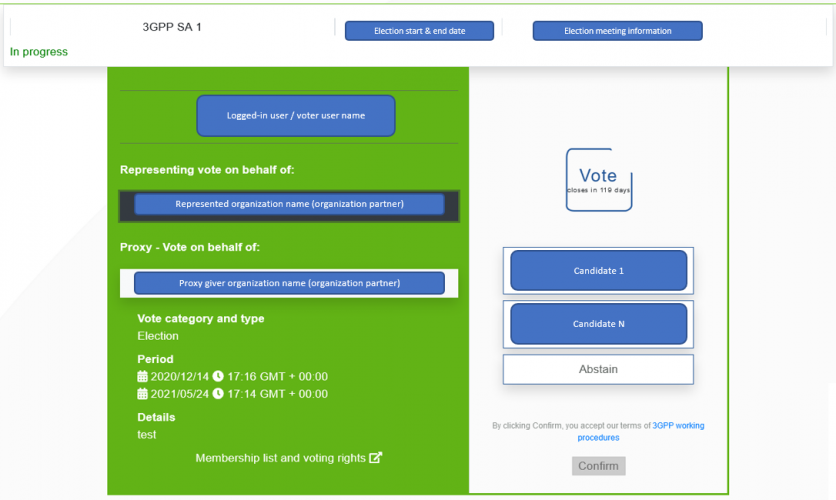
Figure 11 – Example of an election ballot’s voting page, displaying one represented organization.
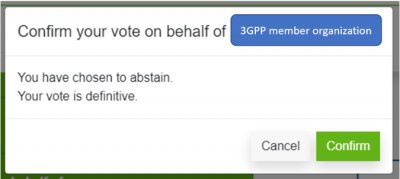
Figure 13 – Example of vote confirmation pop-up message.
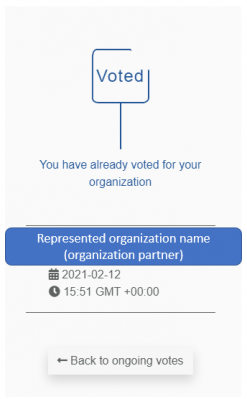
Figure 14 – Example of a vote confirmation message.
Accessing the tool
To access the 3GPP voting tool, one needs a 3GPP portal account, and to be logged in. The 3GPP voting tool is portal-based, hence logging-in to the tool can only be done from the 3GPP portal: https://portal.3gpp.org/.
The direct link to the 3GPP voting tool is https://portal.3gpp.org/VotingTool/ and a “Voting” link is also available in the top green bar via the 3GPP portal's main menu.
Anonymous access
The 3GPP voting tool is inaccessible to unauthenticated (anonymous) users, to comply with security best practices.
Permissions on the tool
A logged-in delegate user can view all the existing votes (elections and technical votes) and ballots, submit a candidature for upcoming elections, edit or withdraw a submitted candidature (that has not been validated yet), consult the voting lists for specific dates and/or meetings, cast a vote (if representing a voting member) and check the closed votes’ results. Giving proxies and managing the given proxies can only be done by authorized official contacts and voting contacts of voting members.
Briefly, a delegate user can:
View closed vote/ballot results: view a closed vote (election ballot or technical vote) results, according to the results dissemination mode chosen by the vote administrator(s).
Basic features available on the home page:
Visualize the list of all votes (elections and technical votes).
Access the vote/election details page (via the “Details” button, for each vote).
Search through the list of all votes (by vote type, working group (WG)/technical specifications group (TSG), meeting, vote title, or even start and/or end dates).
Access the voting list, via the “Voting rights” button (enabled after selecting at least a WG/TSG from the filters). It is also possible to select a meeting (via the “Select a Meeting” filter) to generate the voting list. An example of a voting list is presented in Figure 1.
Good to know:
Basic features available on the vote/election details pages:
For votes of type “election”:
Access vote/election details page, to view and/or participate in its ballots.
Submit a candidature. A user can submit his/her own candidature, by choosing the organization that he/she wants to represent and uploading the candidature files (i.e. CV and letter of support). The user can also edit his/her own candidature details (via the “Edit candidature” button), provided the candidature has not been “Validated” yet. Once the candidature is validated, the candidate needs to contact the vote administrator(s) to perform any changes.
View validated candidates: view all the validated candidates’ name by accessing an election details page and download the respective files (CV and letter of support).
Good to know:
a candidate can represent any organization. The represented organization does not need to be his/her employer organization.
the letter of support uploaded shall come from the organization that the user will represent, as a candidate.
candidatures’ validation is done by vote administrators. Only the “Validated” candidatures are publicly visible (i.e. to all logged-in users).
Access voting page (through “Actions > Vote” button). This option is only possible for users who are eligible to vote. The conditions to be eligible to vote depend on the meeting type (i.e. ordinary face-to-face meeting or electronic meeting), if the vote is associated to a meeting or is by correspondence, user’s represented organization, organization’s voting rights (Refer to the 3GPP working procedures for more details on the voting rights calculation).
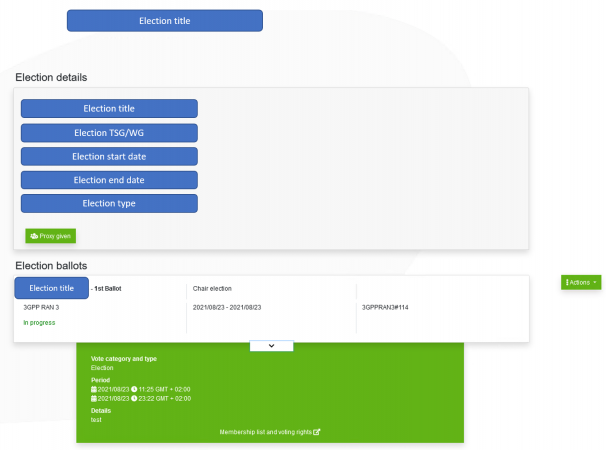
View an election’s voting list by clicking on “Membership list and voting rights” (as shown in Figure 4) once an election ballot has been expanded.
Access the “Proxy” button, to give proxies. This feature is exclusive for elections that are related to face-to-face meetings, and it is restricted to specific users with the appropriate rights to issue and/or manage proxies (i.e. official and voting contacts of a voting member).
For votes of type “technical vote”:
Access vote/election details page, to view and/or participate in the voting session.
Access voting page (through “Actions > Vote” button). This option is only possible for users who are eligible to vote. The conditions to be eligible to vote depend on the meeting type (i.e. ordinary face-to-face meeting or electronic meeting), if the vote is associated to a meeting or is by correspondence, user’s represented organization, organization’s voting rights (refer to the 3GPP working procedures for more details on the voting rights calculation).
View the voting list by clicking on “Membership list and voting rights.” (which is visible once a vote ballot has been expanded, in the user interface (UI), cf. Figure 4).
Access the “Proxy” button, to give proxies. This feature is exclusive for votes that are related to face-to-face meetings, and it is restricted to specific users with the appropriate rights to issue and/or manage proxies (i.e. official and voting contacts of a voting member).
The 3GPP voting tool’s distinct pages
The 3GPP voting tool has several types of pages. In this section, we briefly introduce all of them.
Home page
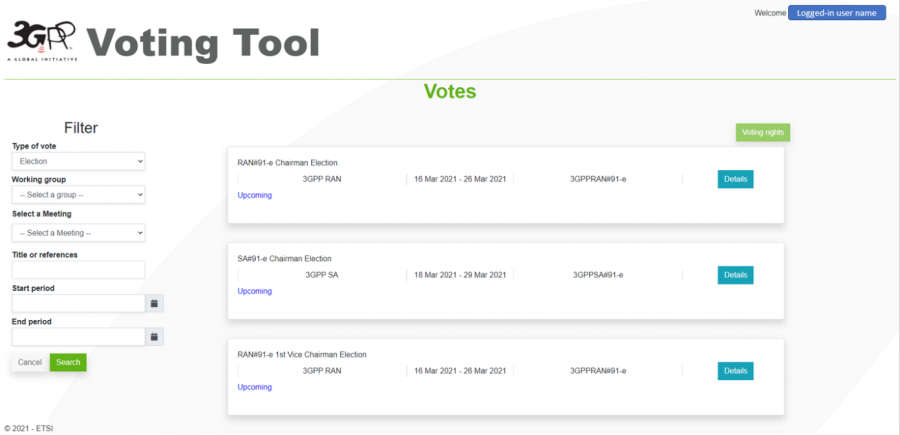
The main page of the voting tool, also known as the home page, displays a list of votes, according to the filtering criteria selected by the user. A filtering panel is shown on the left side of the home page. Once the “Search” button is clicked (cf. Figure 2), the search results (vote information) are filtered accordingly.
Good to know:
- by default (when the home page loads), only the elections are listed. To view the technical votes, the user shall filter the search by “Type of vote: Technical vote.”
Vote/election details page
The URL used for elections and technical votes is always the same, independently of the vote type: portal.3gpp.org/VotingTool/Vote/DetailList/<voteID>, where <voteID> is the numeric identifier of the respective vote (be it an election or a technical vote).
The vote/election details page is useful to view the existing ballots (if any) as well as to access the respective voting page where the delegate can cast a vote (via the “Actions” > “Vote” button, which only appears if the logged-in user is eligible to vote, i.e. if he/she has voting rights for that ballot).
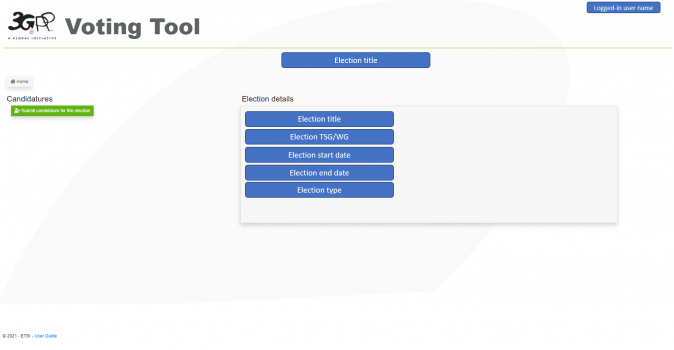
An example of an election details page is visible in Figures 3 and [[#_Toc66107692|4]. On the vote/election details page, all users can see the existing ballots (voting sessions).
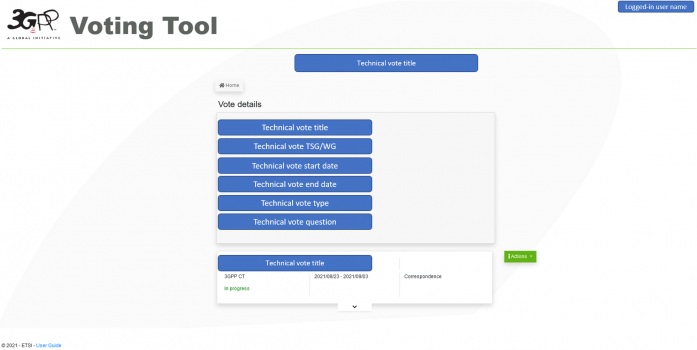
An example of a technical vote details page, for a vote by correspondence, is visible in Figure 5.
Candidature submission button
When a user accesses an election details page, for an upcoming election (i.e. which does not have any ongoing ballots yet), he/she can submit a candidature via the “Submit candidature for this election” button. The candidature submission button is only visible until the election’s first ballot starts. An example of the “Submit candidature for this election” button is visible in Figure 6.
How to submit a candidature?
A candidature can be created/submitted by accessing an existing election page and clicking on the “Submit candidature” button.
On the 3GPP voting tool, a candidature consists of a set of data inputted by a logged-in user:
- Candidate: the logged-in user’s full name. This field cannot be modified.
- Represented organization: a represented organization, chosen by the candidate.
- CV: the candidate’s updated curriculum vitae (CV) in pdf format.
- Letter of support: a letter of support from the Individual Member that he/she represents (see Article 22 of 3GPP WP) in pdf format.
All fields are required.
To submit a candidature, the candidate himself/herself must log in to the 3GPP voting tool. Users can only submit candidatures for themselves (i.e. in their name), without exceptions, independently of the user’s profile.
An example of a candidature submission page is visible in Figure 7.
How to withdraw a candidature?
To withdraw your candidature, make sure to access the election details page and click on the “Withdraw” button (displayed on the left hand-side of the screen). You can only withdraw your candidature if it has not been validated by MCC yet.
Proxy tool button
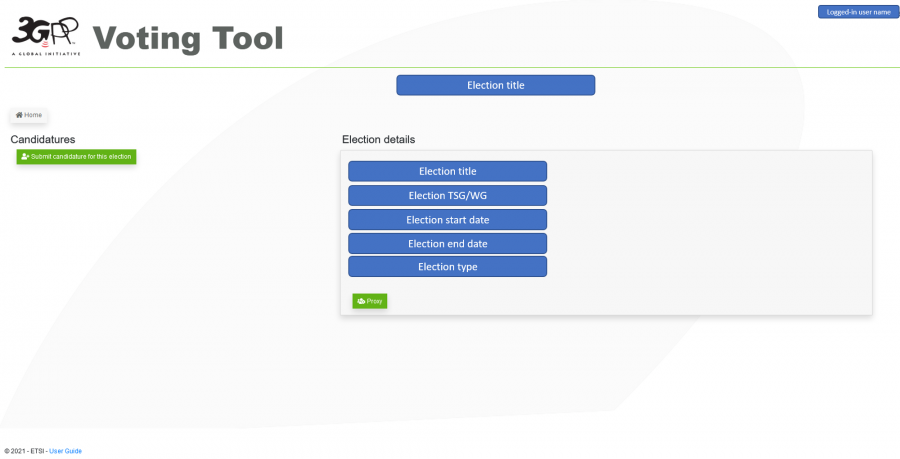
Another option that is available depending on the meeting type (if the vote is related to a meeting or is by correspondence) and the logged-in user’s rights, is the proxy button. The proxy button (visible in Figure 8) allows a user to access the e-proxy tool. The proxy tool button is labelled as “Proxy” and it is only visible/active if the logged-in user has permissions to give proxies for that specific vote’s meeting (i.e. being a voting or official contact of a voting member organization that has voting rights “by proxy” at the respective meeting).
Details pages for votes/elections that do not allow proxies (e.g., votes by correspondence or conducted at ad-hoc meetings) do not contain any “Proxy” button.
Good to know:
- 3GPP proxies are validated as soon as they are created/submitted.
- vote administrators (MCC) can manage all proxies and withdraw them if necessary.
3GPP proxy giving page
A delegate representing a voting member organization can vote on behalf of (up to five (5)) other voting members. 3GPP proxies allow the official or voting contacts of a voting member organization to delegate the voting rights of their voting member organization to a delegate of another voting member organization who will attend the respective face-to-face meeting.
The 3GPP voting tool is integrated with the electronic proxy (e-proxy) tool. This means that the 3GPP voting tool users can (if being official or voting contacts of a voting member organization) give 3GPP e-proxies for voting purposes, in the scope of elections or technical votes.
The proxy giving page is only visible/accessible to users who have the rights to give proxies on behalf of a voting member. Such users can create and withdraw proxies, on behalf of all organizations for which they have the rights to. An example of a proxy giving page is in Figure 9.
When a proxy is withdrawn, it loses its value, hence not allowing the proxy receiving person to use it for casting a vote. The proxy withdrawal can be done by its creator, or the vote administrator(s)/MCC, simply by clicking on the red button (cf. Figure 10).
Good to know:
- when trying to select a proxy receiver: the proxy receiving person must be registered for the respective meeting and the proxy receiving company must be allowed to vote in person (in the vote/election’s voting list) otherwise this company does not appear in the list of possible proxy receivers. Note: the proxy receiving person can only use a proxy to cast votes when he/she is checked in for the corresponding meeting at which the ballot takes place.
- a proxy is visible to the official contact and/or voting Contact who gave the proxy, the proxy receiving person, and the votes administrator(s).
- a proxy can be managed by the proxy giving person and the votes administrator(s).
Voting page
The voting page allows a user to cast votes on behalf of the voting member organization that he/she represents or the proxies he/she has:
- If the respective vote/election is by correspondence, the user can cast votes on behalf of all the voting member organizations for which he/she is a voting or official contact. Proxy votes are not allowed for votes by correspondence.
- If the vote/election is associated to a meeting, the user can cast votes on behalf of his/her represented organization, at that meeting. Proxy votes may be allowed if the meeting is ordinary (e.g., a face-to-face ordinary meeting); hence the user can also vote by proxy on behalf of (up to five (5)) other proxy giving voting member organizations.
Each ballot has its own voting page. A voting page is accessible via the URL https://portal.3gpp.org/VotingTool/Ballot/Vote/<ballotID>, where <ballotID> is the numeric identifier of the respective ballot. The voting page can also be accessible from the vote/election details page through “Actions > Vote” button in the associated ballot.
The content of a voting page, cf. exemplified in Figure 11 above, consists in:
- a list of 3GPP Voting Member organizations on behalf of which the logged-in user can vote, displayed on the left hand-side. If the user is carrying any valid 3GPP proxies, the respective proxy giving voting members will be listed on the left hand-side as well, cf. exemplified in Figure 16 below.
- And the possible voting options allowed for the respective vote/ballot, displayed on the right hand-side.
How to cast a vote?
To cast a vote, the logged-in user shall be registered and checked-in at the meeting (provided the vote is not done by correspondence), access the voting page, and proceed as follows:
Select the voting member organization on behalf of which the user wants to cast a vote, from the options visible on the left side, cf. Figure 11.
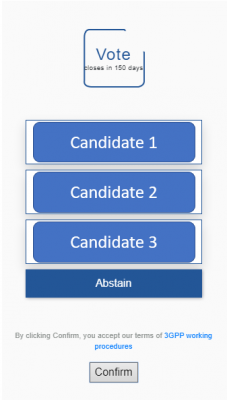
Select the desired voting option on the right (i.e. a candidate name or “abstain” for elections; or “yes,” “no” or “abstain” for technical votes). The possible voting options are displayed cf. exemplified in Figure 12.
Click on the “Confirm” button, which will be enabled as soon as steps (1) and (2) are completed.
Once the “Confirm” button is clicked, a pop-up message appears with a summary of the voting member represented and the voting option chosen. The user must verify the details and confirm them, by clicking on “Confirm” again. An example of a confirmation message for an abstention vote is shown in Figure 13.
As soon as the vote is registered successfully, the user will see a message informing that his/her vote has been registered, as exemplified in Figure 14.
The user can select another voting member organization on the left side and repeat steps 2 to 4 to cast a vote on behalf of that voting member organization.
When going back (via “Back to votes”, cf. Figure 14), if selecting the same voting member name on the left – or another voting member on behalf of which a vote has already been cast – the information about its voting status will be shown (i.e., name of the voting member that already cast a vote, and vote’s registration date/time). This is exemplified in Figure 15.
If the logged-in user is carrying any valid 3GPP proxies (i.e. given to a voting member which he/she is representing at the respective 3GPP meeting), then the respective proxy giving member names are listed on the left (under “Proxy – vote on behalf of”), as shown in Figure 16.A voting page is not accessible to all users. Its access is restricted to those who are eligible to cast a vote on the respective ballot. Hence, when trying to access the voting page without the correct permissions, the user will not be allowed to access it and will get an error message instead.
Types of votes
There are two types of votes in the 3GPP voting tool: election and technical vote. A vote’s type is defined at creation time, by a vote administrator, and cannot be modified afterward.
Elections
Elections are the type used to decide who to elect for the position of chairperson or vice-chairperson of a working group (WG) or technical specification group (TSG).
An election consists, typically, in 1 to 3 ballots. However, if some ballots are cancelled, it is possible to have more than 3 ballots total. Each ballot represents a single voting session, for an election.
The information of each ballot is visible on the election details pages. A ballot can be identified by its title. A ballot title is automatically created by the 3GPP voting tool and is based on the election title itself, appended by a unique ID (numeric identifier). In short, ballot titles consist of the election name, appended by “1st/2nd/3rd ballot”.
Ballots can only be created if an election already has at least 2 validated candidatures. Vote administrators will select the considered/validated candidates upon ballot creation.
Good to know:
- if “late” (i.e. after ballot creation) candidatures are received and validated by a vote administrator, and an “upcoming” ballot already exists, then a vote administrator user must edit the ballot and add the newly validated candidate manually. Hence it is recommended to always contact/remind the vote administrators when this happens, even if email notifications are automatically sent.
Technical votes
Technical votes are votes called to resolve a technical issue for which a WG/TSG has not obtained consensus yet. Technical votes consist of one single voting session. Hence, for technical votes, we do not have the notion of “1st/2nd/3rd ballot”.


